
Pergola renderings — a professional guide with live examples
Published 12 de mayo de 2026 · 7 min read
When a customer asks for a pergola, they want to see the result before they pay for it. A quote full of numbers and dimensions is not enough — it does not sell. A professional 3D rendering closes deals faster and cuts the number of changes at the production stage. This article covers what a good pergola rendering looks like, what belongs in it, and how to produce one in minutes rather than hours.
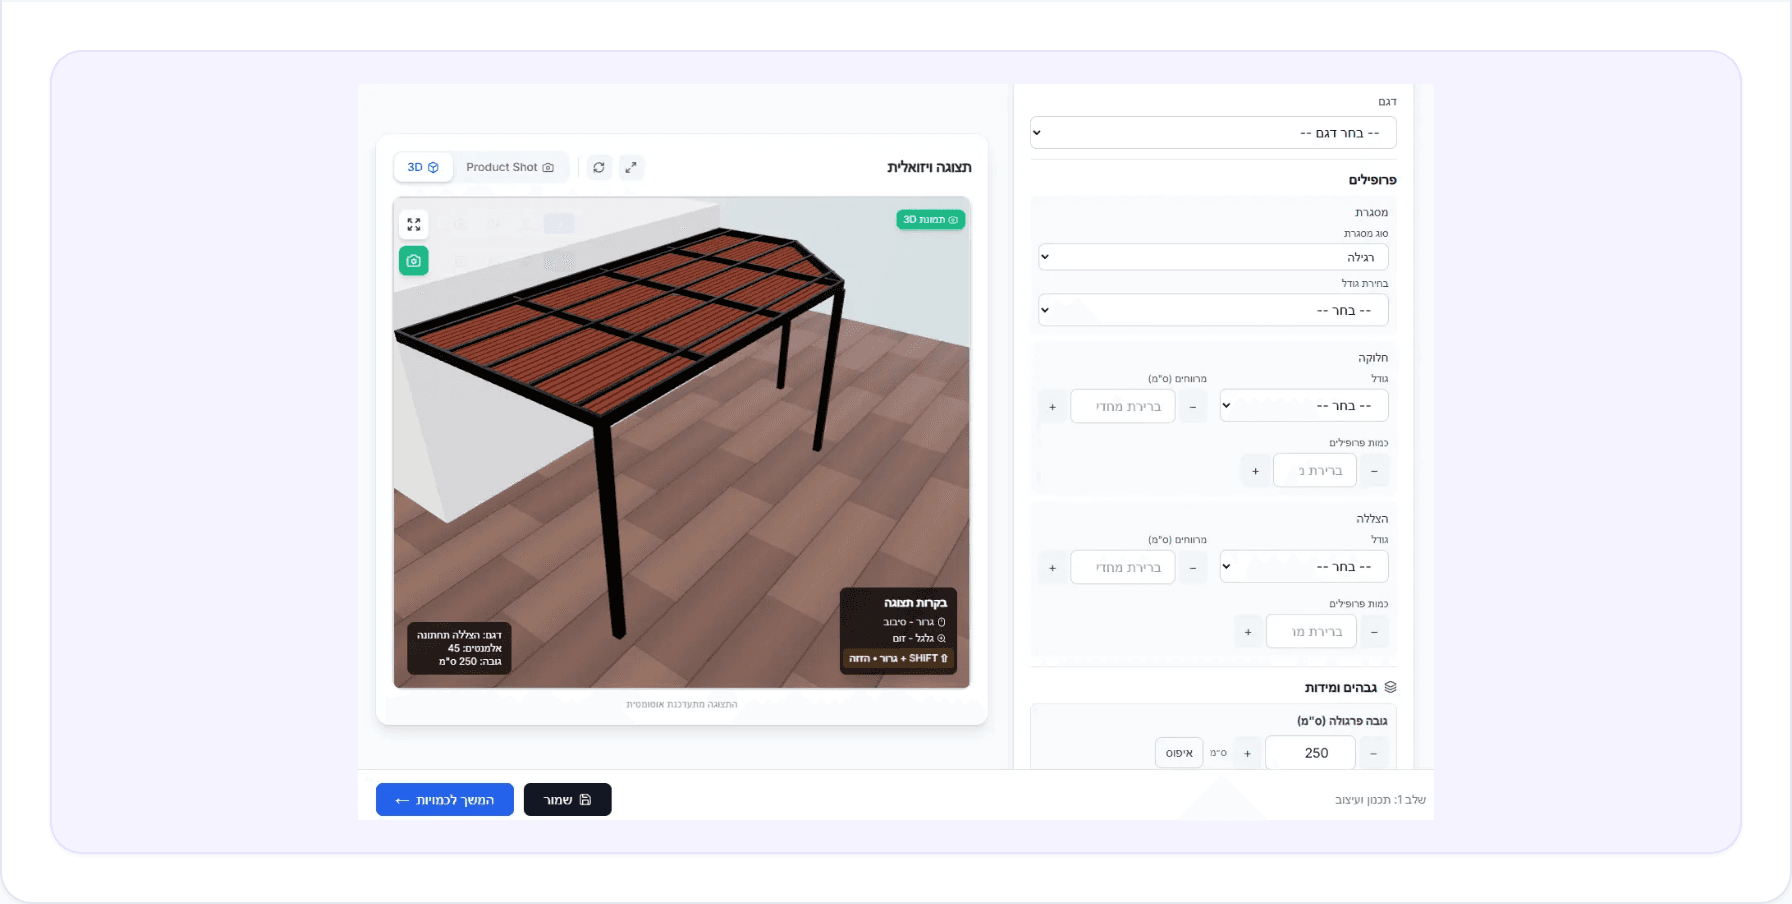
What is a pergola rendering, exactly?
A pergola rendering is a visual representation of the project before it is built — also called a “render” or a “visualisation”. In the aluminium trade there are three levels, each serving a different purpose:
- 2D (top view): The pergola seen from above — structure, dimensions and beams. This is the engineering view.
- Interactive 3D: A spatial view you can rotate, zoom and recolour. This is the sales view.
- Photorealistic render: A single high-resolution image with realistic lighting and shadows. Slow to produce and less flexible, but very persuasive.
For most contractors the winning combination is 2D plus interactive 3D — fast, flexible, and wired straight into the material calculation.
Why renderings matter to a contractor
A pergola contractor without a rendering competes on price. One with a professional rendering competes on value. That difference shows up as four measurable gains:
- Deals close faster. A customer looking at the pergola in 3D stops asking “what am I buying?” and starts asking “where do I put it?”. The decision takes less time.
- Fewer changes on site. Most expensive production changes come from the customer having pictured something different. Showing them first saves recalculation, re-cutting and re-ordering.
- You can ask a higher price. A professional presentation explains why your pergola is worth ₪25,000 rather than a competitor's ₪18,000.
- Differentiation from smaller makers. Most small manufacturers still send a reference photo off the internet. A rendering of the customer's actual project is a real competitive advantage.
Step one: the 2D canvas drawing
Before any 3D work, you always start with a 2D drawing. The drawing is the mathematical basis — it fixes the exact dimensions, the number of frame, division and shading beams, and where the pillars go.
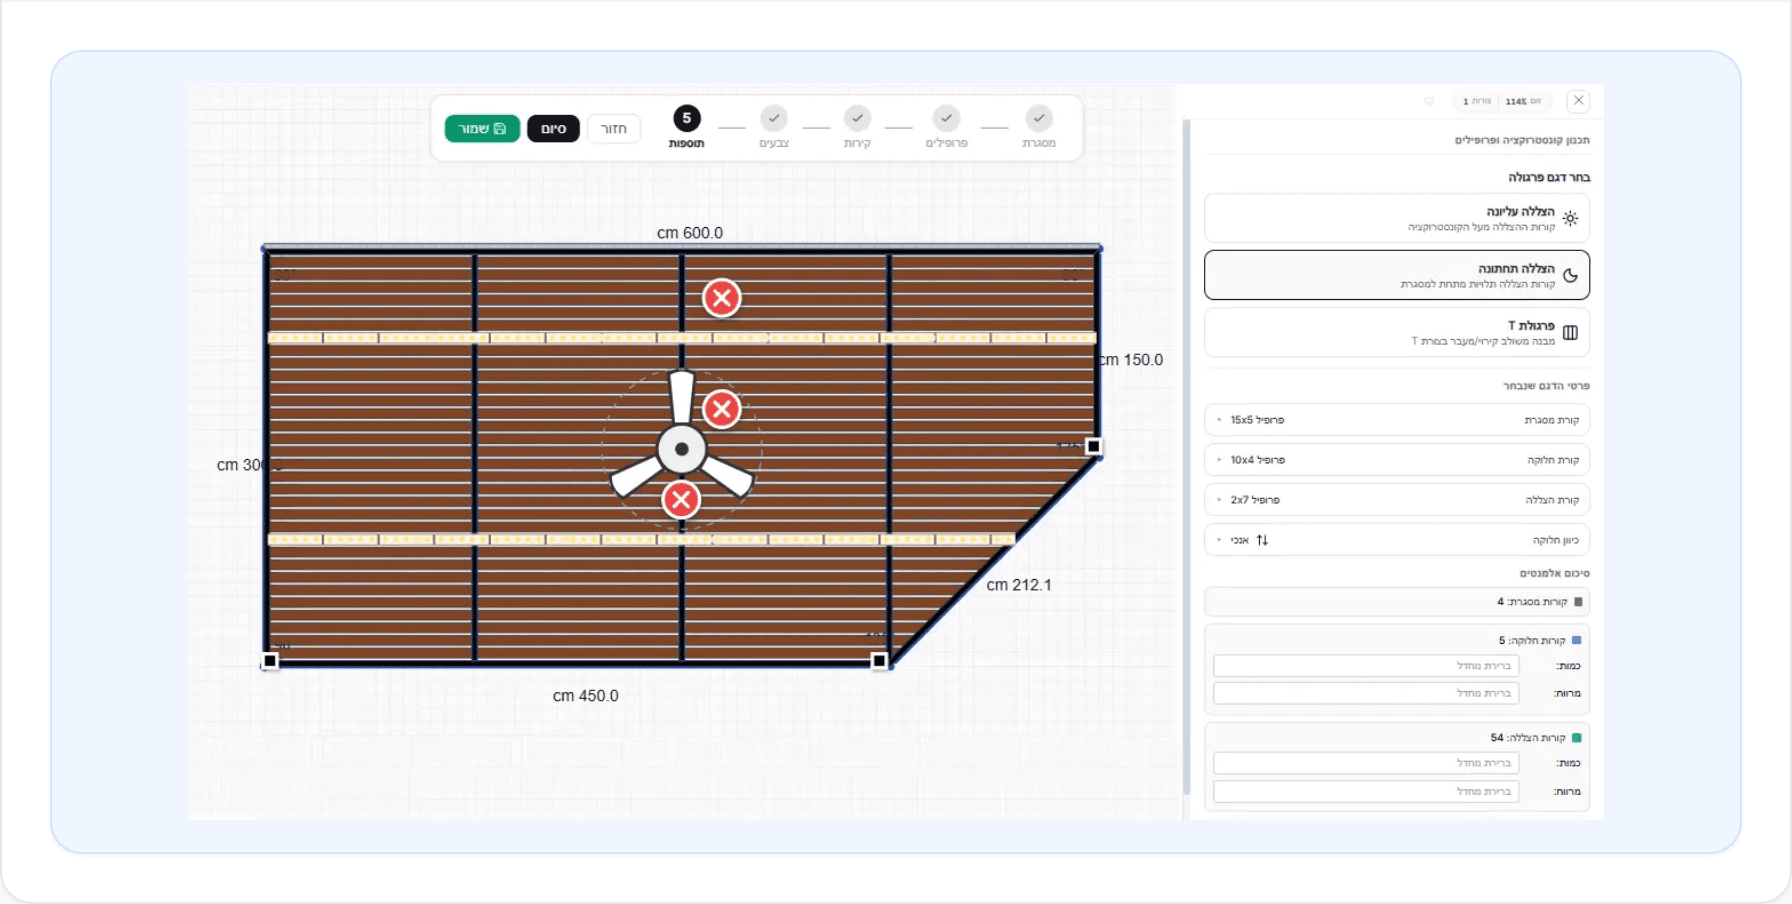
AluFlow's canvas lets you set the shape (rectangle, L, or an arbitrary polygon), give every beam its dimensions, and change the shading density. Every change updates both the bill of quantities and the 3D rendering immediately — nothing is calculated twice.
Step two: the 3D rendering
Once the canvas is ready, the 3D rendering is generated automatically. It is not merely a “translation” of the drawing — it is a full interactive view with:
- Camera control — orbit, zoom and pan
- Live colour changes — beams, pillars and shading independently
- Different backgrounds (garden, deck, terrace) to give context
- Dynamic lighting — morning, midday, evening
- Real shading beams at the correct spacing and thickness
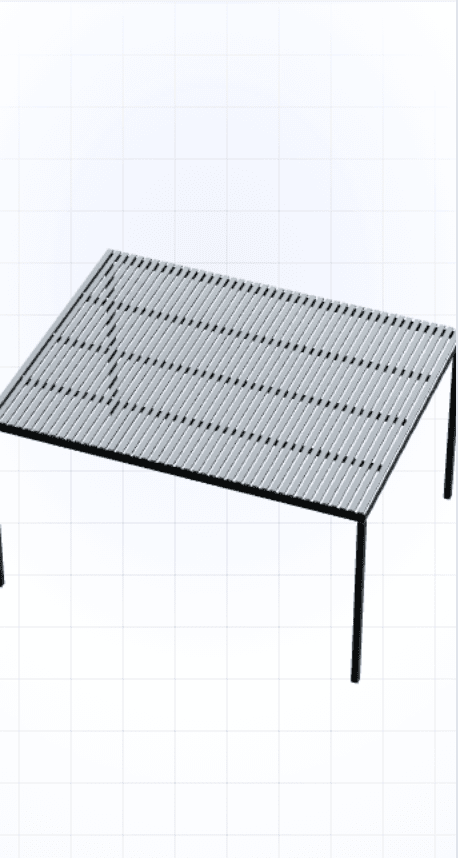
Going from a 2D canvas to a 3D view is not a marketing trick — it is a geometric realisation of the actual profiles. Every shading beam in the rendering shows the true cross-section of the profile you chose, at the spacing you set on the canvas. The customer sees exactly the product that will arrive.
How it is done today — and the problem
Most pergola contractors still work with generic tools: a CAD package for drawing, a modelling tool for the visual, and a spreadsheet for quantities. Each is separate, and every change means updating all of them by hand. A typical process for one pergola:
- 30-60 minutes — drawing in CAD
- 60-120 minutes — building the 3D model
- 30 minutes — a manual BOQ in a spreadsheet
- 20-40 minutes — corrections after the customer asks for a change
Total: 2.5 to 4 hours for a single pergola. At 10 quotes a week that is a 30-hour job just doing design. Now multiply by what your designer costs.
The answer: one platform
A platform built for pergolas (AluFlow, for instance) joins every stage — canvas drawing → 3D rendering → bill of quantities → production plan → quote — into one system, with one set of data kept in step everywhere.
In practice that means when a customer asks to widen the pergola from 3 to 3.5 metres, you drag one point on the canvas. The 3D rendering updates, the bill of quantities updates, the quote updates, and the production plan updates. All automatic, all within a second.
A typical AluFlow process for one pergola:
- 2-3 minutes — draw the canvas
- Automatic — 3D rendering + BOQ + production plan
- 10 seconds — apply the customer's change
- Automatic — everything downstream updates
What belongs in a customer-facing rendering
Not every rendering is a good one. What separates a professional rendering that closes a deal from a generic one that stays in the drafts:
- An accurate colour. If you are offering matt black (RAL 9005), show matt black — not glossy grey. Colour is 70% of the visual impression.
- Correct proportions. An 80×40 mm beam profile should look like 80×40 mm. If the customer wants to see a substantial pergola, it should look substantial; a light, delicate one should look light.
- Real shading spacing. If you specified 70% shade, show 70%. Different spacing in the rendering and in reality means complaints.
- An environmental background. A pergola always looks better against a deck, garden or terrace than on an empty white background.
- A shareable link. The customer should be able to open the rendering on their phone, rotate it and show their partner — without installing an app or opening a file.
Frequently asked questions about pergola renderings
Does a rendering replace production drawings?
No. A rendering is for the customer. Production drawings are for the workshop — exact cut angles, cut lengths per profile, and waste optimisation. In AluFlow both come from the same canvas, so they are always consistent.
Can motorised (adjustable louvre) pergolas be shown?
Yes. AluFlow has templates for static pergolas, for manual louvres, and for motorised bioclimatic louvres. Each template renders the appropriate components.
What about a wall-mounted pergola?
A wall-mounted pergola is a standard template. The rendering shows 2 pillars instead of 4, and the frame beam on the wall side disappears. Both the mathematics and the rendering adjust automatically.
In summary: a professional rendering closes the deal
Pergola renderings are not a nice-to-have — they are a core sales tool. A contractor who can show a customer an accurate 3D rendering within minutes of the enquiry is working in a different world from one who sends a quote with a stock photo attached.
Open a free AluFlow account, draw your first pergola on the canvas, and get a complete 3D rendering in under five minutes. Nothing to install — it all runs in the browser.
¿Listo para empezar?
Prueba gratuita de 7 días con acceso completo. El cobro comienza solo al finalizar el período de prueba.